In Home Blood Testing - NY
Last updated March 11, 2025
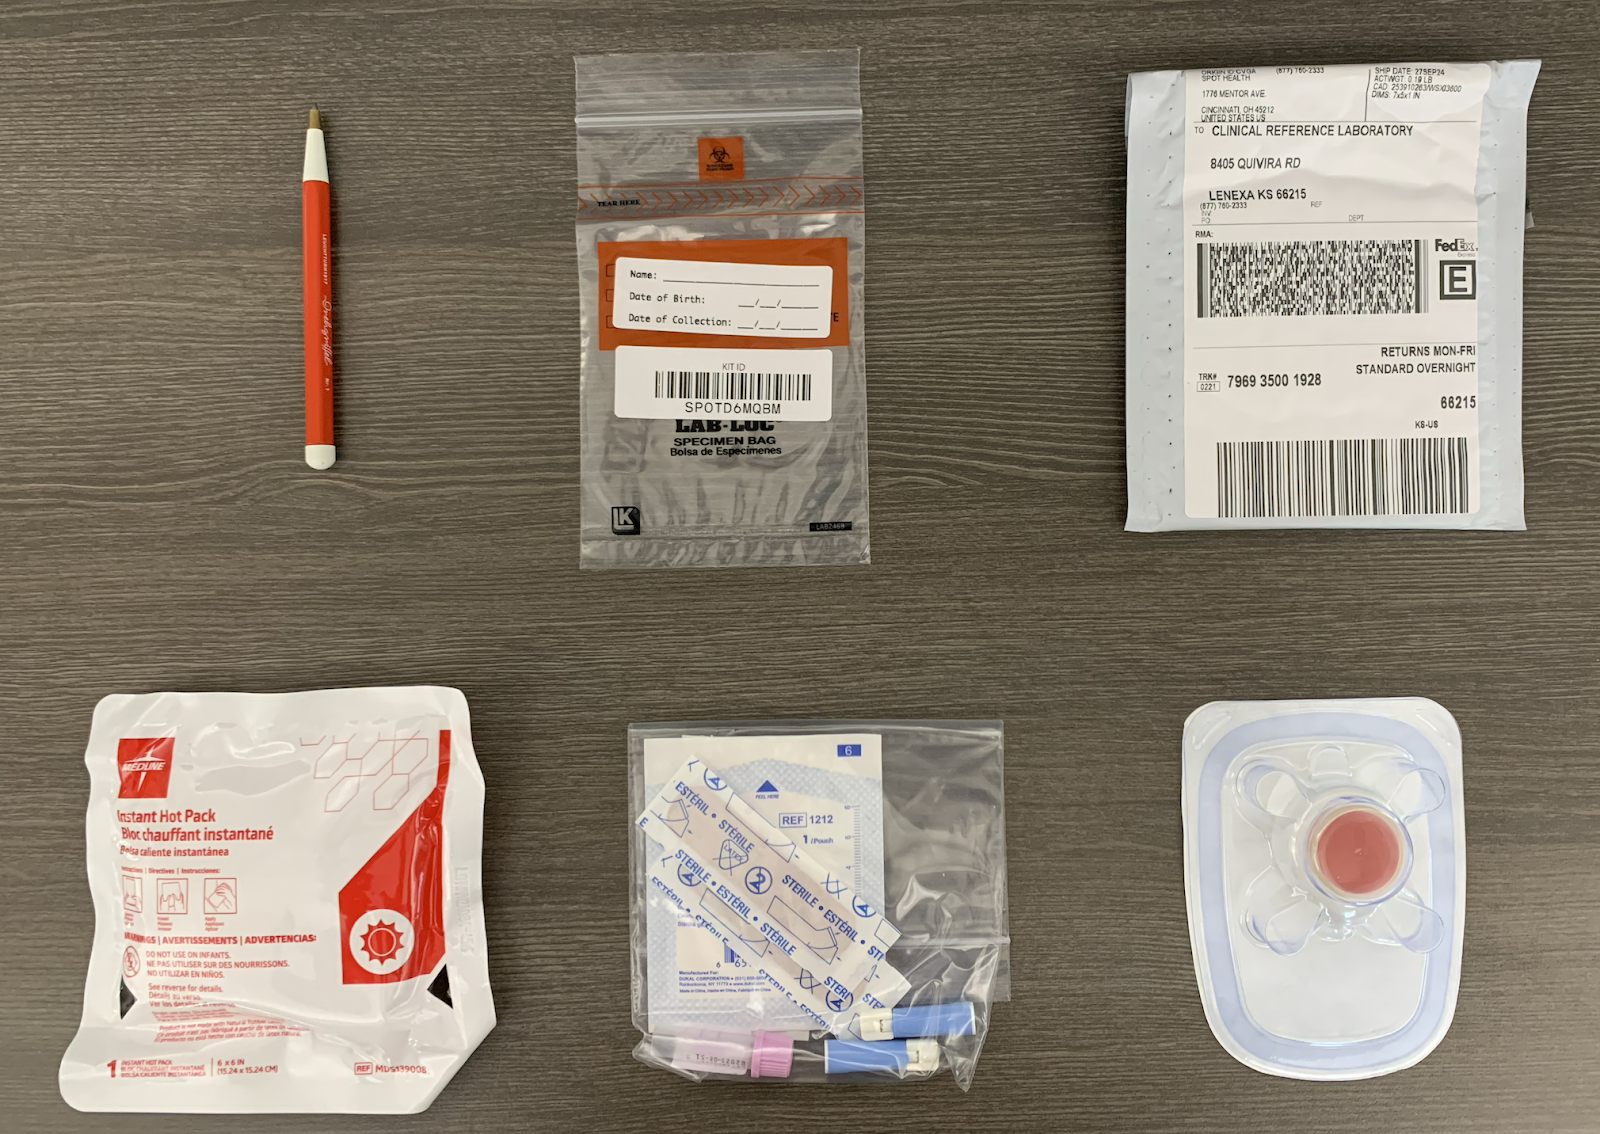
What to do when you receive your Tasso Microtainer Blood Sample Kits
These instructions are specific to the New York participants. You should have a separate email with the tracking ID. Note: Samples should be returned via FEDEX. Important! Sample and ship Mon-Thu and avoid a Fri-Sun drop off / pick up to preserve the sample integrity.
The testing is simple but we’ve collected some tips and tricks to make it as easy as possible:
1. Plan Ahead
The Tasso microtainer collection system takes about 15 minutes to set up and administer. You need to be sure that you allocate that much time. You will also want to be sure that you can arrange FEDEX pickup or drop off as the case may be for you, for the sample on the day it’s collected. You may want to sit aside a morning on the weekend to sample if it's less stressful to sample then.
Sample soon after waking (or diurnal hormones will be off) after a glass of water but BEFORE EATING/DRINKING/PILLS (or glucose and insulin will be off) and BEFORE EXERCISING. Set your kit out the night before as a reminder, along with a fine tip smear-proof pen/sharpie.

2. Hydrate
Drink a full glass of water when you wake up. Sampling is more difficult if you’re dehydrated.
3. Register Kit and Prep to Poke
Register your kit! Use the same email that you used to install the BODYSIM app.
Be sure to read the instructions. As part of the registration process, watch the video on sample collection.
Apply the heat pack or a hot washcloth to the application area long enough to completely warm that area.

4. Mise En Place
Set up your “testing station” like the cooking concept “mise en place”. Take the time to set up, write your name/dates on the return bag. You’ll be returning the tube that attaches to the Tasso device so be sure to fill out the D.O.B. on the tube. Lay out gauze and band-aids. Remove the cap from the tube and attach it to the Tasso device.
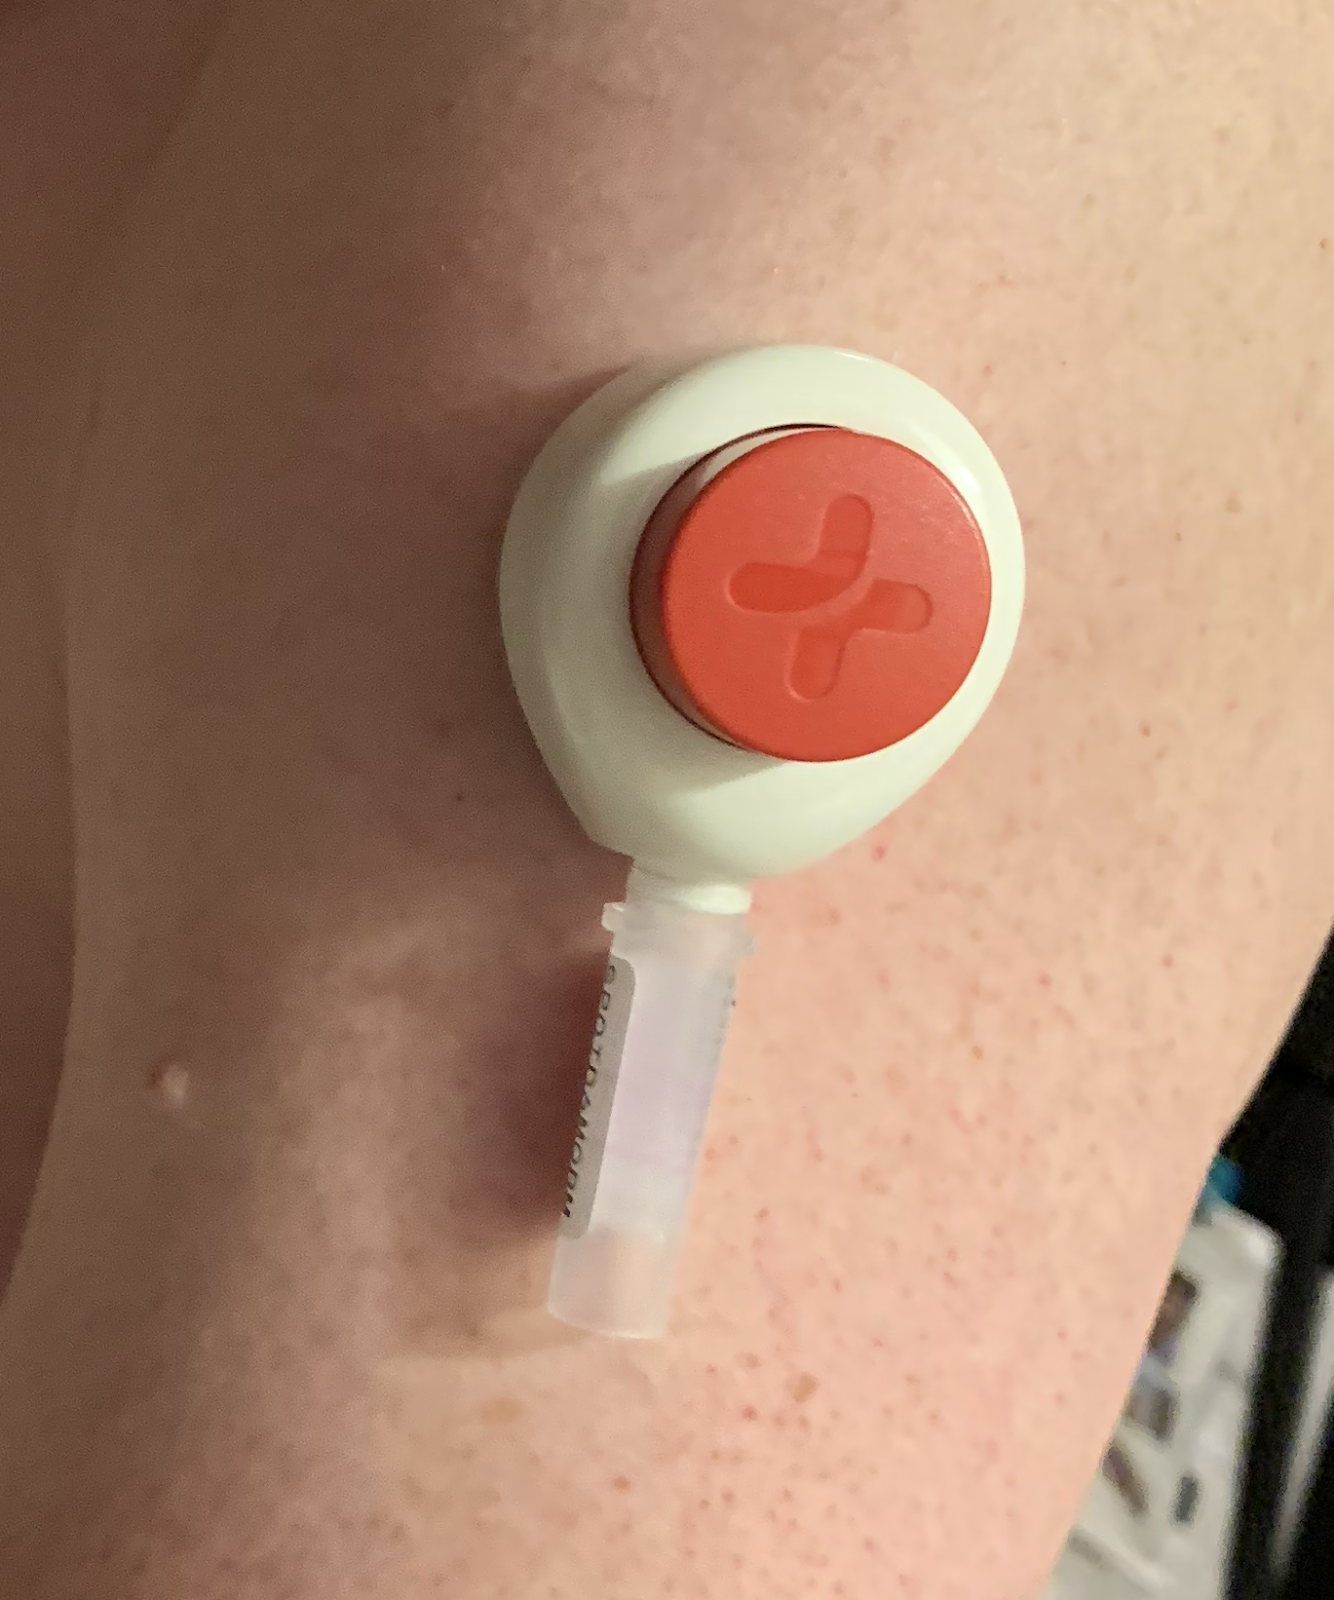
5. Apply, Monitor and Wait
Remove protective packaging, place the Tasso on your arm and press the button. You may feel a prick but less so than getting a shot, Wait, blood might not appear for a minute or two. Monitor the collection in the vial. A sufficient sample is collected once the blood reaches the top line. This can take up to 5 minutes. Remove the Tasso from the collection when the sample is complete. Remove the vial from the Tasso collector.
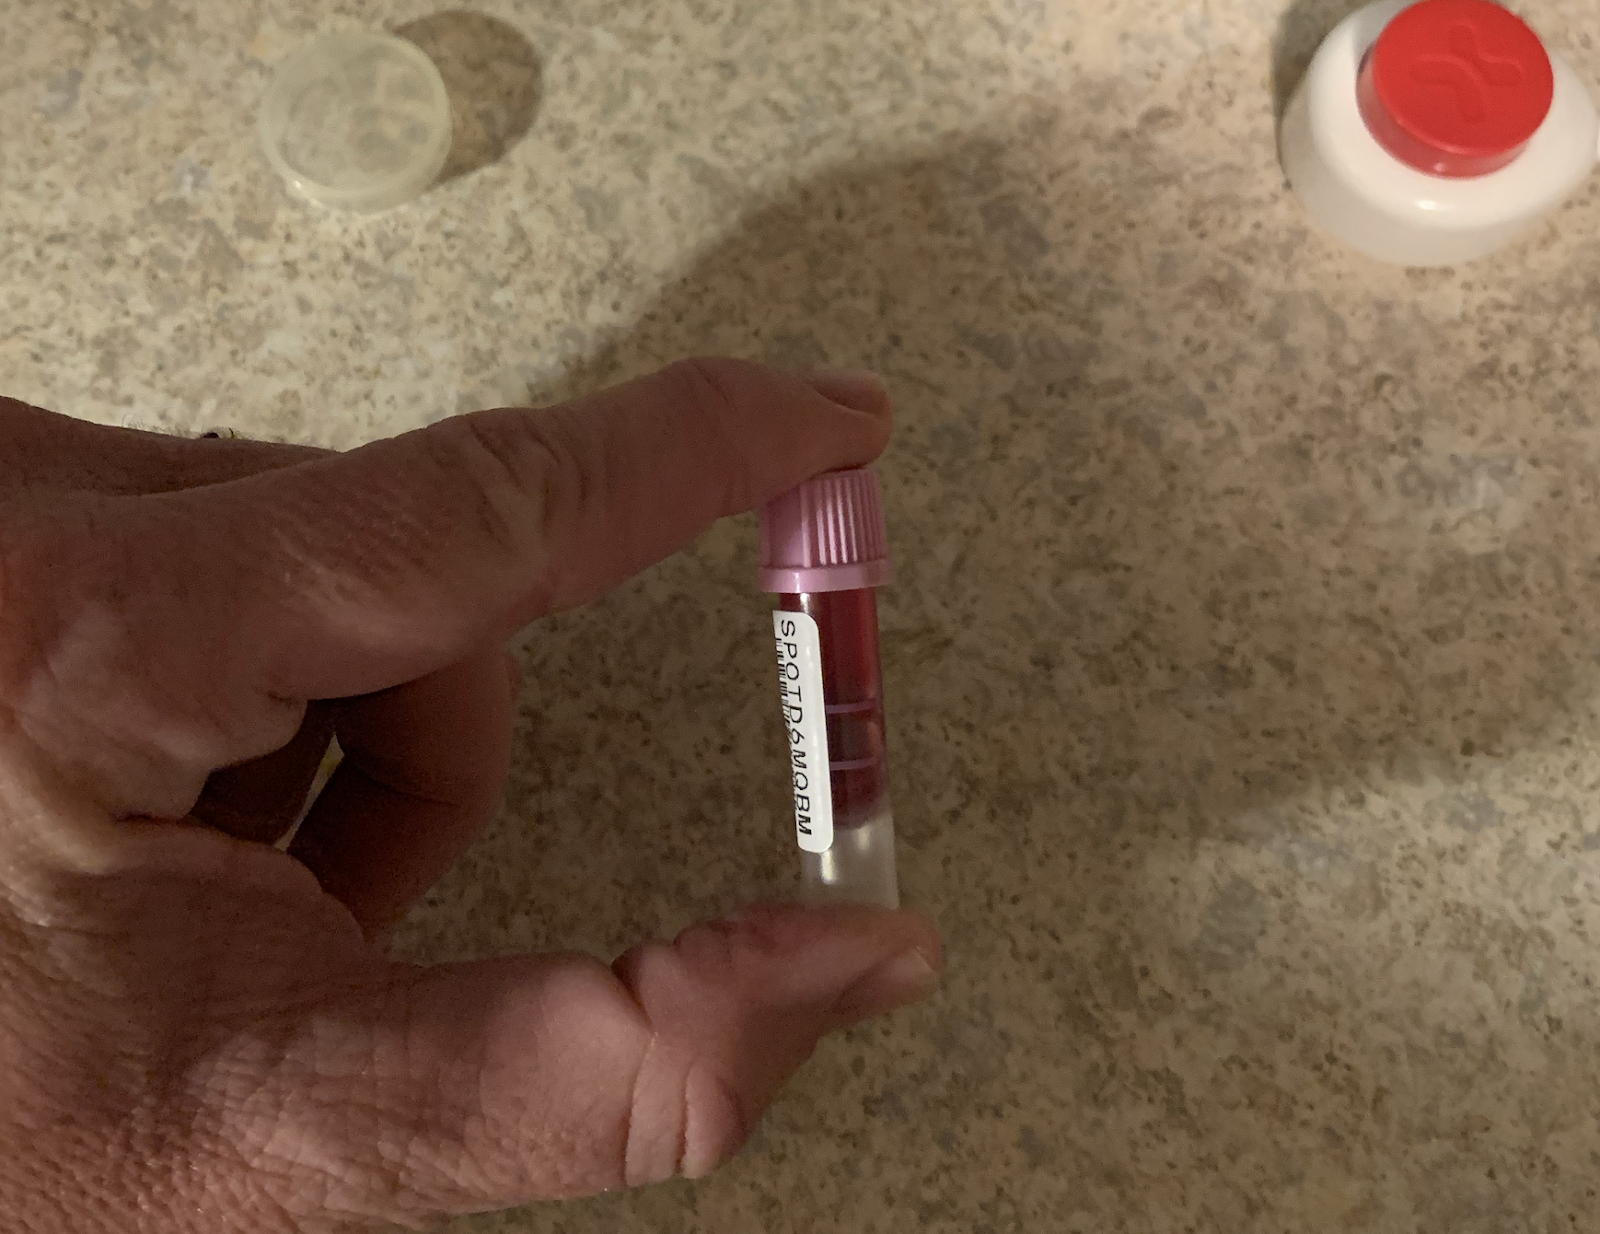
6. Snap, Invert and Ship
Snap on the cap and invert the tube 10 times and flick as shown in the video to mix the sample with the gel inside of the tube. This tube will go into the sample bag and the sample bag will go into the return package. Be sure to ship off via FEDEX the same day!
Other Notes
If the heat pack doesn't work, substitute a hot washcloth for two minutes if needed
When you push the button to apply, you may barely feel a prick and wonder if blood is going to come out. Wait 2 minutes, and if blood is not entering the tube, remove the device. Contact us and we’ll request a replacement.
Watch the video and flick the vial as demonstrated to ensure that the sample mixes.
The package came with extra lancets; discard them. If the Tasso doesn’t work after two minutes of application, it doesn’t work. Report the issue and we’ll request a new kit on your behalf.